Wednesday, 26 November 2014

Favourite Summer Products!

I am super excited that it is going to be summer in a few days in Australia! This is definitely my favourite time of the year! In today's blog post I am going to go through a few of my favourite summer related beauty bits and pieces to share with you. These will definitely be the things I will be reaching for in the next few months!

1. Neutrogena Sport Face

This is an oil-free face sunscreen that is sweat and water resistant. It now comes in 70+ SPF which is great! Protecting your face from the sun is so important, especially in Australia where the sun can be very strong. I use this everyday in summer under my makeup and I find that it doesn't clog my pores or have that oily look that regular sunscreen has.
                                                        

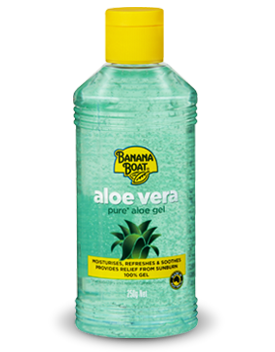
2. 100% pure Aloe vera gel

I am absolutely loving Aloe Vera at the moment. It is really moisturising and nourishing for your skin, which is great when you have dry skin like me. It is also great for when you get a little too much sun and it helps to cool down your skin and relieve any sunburn. I also use this mixed with moisturiser as a natural primer for my skin. It really helps to create a matte base prior to makeup.


3. Perfume - Escada Taj Sunset

This is a limited edition perfume, but you can still find it online. It is my favourite summer perfume by far. It has a very fruity smell with mango definitely being one of the top notes. For anyone knows of Escada Rockin' Rio which was a limited edition years ago, it has quite a similar smell. It is the perfect summer smell.


4. Baiden Mitten

This is a type of exfoliating glove made of woven tree fibers. This is what I use to remove my fake tan when it starts to go a little patchy. To use it, go into the shower for about 5/10 minutes to help open your pores and wet your skin. Then turn off the water and scrub with the mitten up and down (not in circles) and you can literally see the top layer of dead skin cells coming off. It is slightly gross but also amazing to see how well it works. When you wash it all off you are left with really soft glowing skin!


5. Rimmel Natural Bronzer

This is my go-to natural looking bronzer. This is something I reach for a lot in summer to give me that sun touched glow. I use this to contour my face, and I often also use it on my chest, as I feel like this area doesn't hold my fake tan as well. Just an all round great product which I especially use in summer!


So there you have it,  the top 5 things I use in summer - besides fake tan and my body brush which I have mentioned in previous posts.

Thanks for reading!
xoxo Yvonne - Be Beautiful

Sunday, 23 November 2014

Fake Tan Tips

Fake tanning is definitely an area I know well. Naturally I have quite fair skin and though I can tan, I choose to wear sun screen and try to stay out of the sun because it is so bad for your skin. Instead, to make myself a natural looking golden shade, I use fake tan. I have been fake tanning for about 7 years now, and I think I have perfected the technique! People can never tell that I use fake tan, and I when they find out they are shocked because it looks so natural!

Fake tan has a lot of misconceptions about it: having an orange "oompa lumpa" look, having streaks, patchiness, and getting orange hands after use. While these things can all happen, if you use the right products in the right way, you can avoid all these things. So read on to find out my top fake tan tips to getting a natural looking fake tan.


First timers:
Try using a gradual tan to begin with. This is a great way to start with because it is only a hint of colour, so mistakes such as streaks are not as obvious. It is a great way to get used to applying it carefully and gives you an idea of which areas you need to concentrate more on. My favourite gradual tan is Palmer's Cocoa Butter Formula Natural Bronze. This gives a very natural colour and is so good for your skin because it has Cocoa Butter in it.

Products I recommend:
Depending on what type of application you prefer, these are the products I recommend with some positives and negatives:
Mousse formula - Le Tan Foaming Mousse. Comes in two shades. Can see where you apply it and there is instant colour. Not quite as natural looking as spray option.
Spray formula - Le Tan in Le Can (my favourite option). Comes in two shades, most difficult to apply but easier when you spray and rub it in. Can see where you have applied and you have instant colour. Most expensive option as the can only lasts about 1.5 applications.
Gradual tan - Palmer's Cocoa Butter Formula Natural Bronze. Easy to apply as there isn't much colour. Cannot see where you have applied. Need to wait about 8-10 hours to see colour difference. Low chance of streaks.

Before tanning:
  • Thoroughly exfoliate your skin all over, especially around dry areas such as ankles, knees, elbows and the front of your shoulder crease.
  • For hair removal, I recommend waxing at least 2 days prior to allow your pores to close, and shaving within 24 hours prior to fake tanning to avoid needing to shave to many times after which takes off tan.
  • I find it best to wait about 30 minutes after a shower before I fake tan. This is because the hot water opens up your pores and if you apply it straight away you will get the tan going into the pores on your legs, making them look spotty.
  • Apply some moisturiser to the dry areas of the skin to avoid the fake tan concentrating in these areas. This includes the ankles, knees, elbows and the crease at the front where your arm meets your body.
  • Tan before bed so that your tan can develop without any issues.
  • Brush your teeth before. Accidentally splashing water on your tan will ruin it.

Applying tan:
  • When applying tan, there are a few options for avoiding orange hands. One is to use a fake tan mitt, one is to wear gloves and the last option is to thoroughly wash your hands after.
  • Start from the bottom and work your way up. This is so that you don't cause creases in your upper body if you do your legs last.
  • Use circular movements to ensure it is rubbing in and that you won't have streaks.
  • Fake tan everywhere - this includes your neck, bum, boobs and back of hands(last). This makes your tan look the most natural.
  • If you are worried about breaking out on your face, buy a face specific tan as well.
  • Use sparingly when you are applying to the dry areas that have been mentioned above.

After tan:
  • When you have finished tanning, allow it to dry before dressing.
  • Wear dark colours to bed because it can rub off onto clothing.
  • Wait till the tan has fully developed before getting wet- about 8 hours.
  • When you shower the first time after applying tan, the guide colour will come off, leaving only the tan making you look slightly lighter. 
  • Moisturise daily to keep the tan staying fresh.
  • When you notice the tan going blotchy from rubbing off in certain areas, or not looking as good, exfoliate it all off really well and begin again!

Last tip - fake tanning takes practice to get it right, so don't expect it to be perfect your first time. Sometimes getting it right could just be a matter of finding the right products and formula for you, or practicing application to know what areas you tend to get streaks. Don't give up!

Please leave any questions your have in the comments and I will be happy to help!

Enjoy your newly tanned body,
Xoxo Yvonne - Be Beautiful


Tuesday, 18 November 2014

Body Brushing Challenge!

A couple of days ago I started what I am going to call, the 30 Day Body Brushing Challenge. Basically I am going to be dry brushing my skin at least once a day for 30 days (or at least try to!). Then I will report back any changes I have noticed in my skin.If you haven't heard of dry brushing before, it is the concept of using a natural bristle brush to brush against dry skin. This is an ancient practice that is known as a way to "detox" the skin by cleansing it inside and out to result in better skin appearance. Now you are probably thinking, how on earth would brushing my skin do that? Firstly, it exfoliates your skin on the outside removing dead skin cells and waste excreted by the skin which clogs pores. And secondly, it promotes blood flow and lymphatic drainage, which pretty much means that toxins and waste are removed from your body faster.


Benefits of dry brushing:
 1. Increase lymphatic draining to get rid of waste in our bodies. 
2. Exfoliates skin to help unclog the pores3. Increases blood circulation which also improves waste removal 
4. Reduces cellulite by helping to smooth out fatty deposits 
5. It feels great! It gives your such an invigorating feeling when you dry brush 
6. It even improves muscle tone 
7. Prevents premature aging by tightening the skin 
8. Improves the nervous system by stimulating  the nerve endings in your skin
 So all of those benefits make body brushing seem pretty amazing to me. Especially when all your need is a body brush which you can buy from under $20. I got mine from The Body Shop in Australia for $19.95, but you can also easily buy them online.
 How to do it:

Always start with dry skin, the best idea it to do this before bathing so you can wash of all the skin skin you have removed. When dry brushing the basic principle is to always brush toward your heart. Starting with your extremities brush from the furthest part away and then brush towards the heart.
 This is the process I use when dry brushing: 

  • I always start with my the bottom of my feet, then the top and then move up my leg to my bottom, with long sweeping movements.
  • After my legs I move to my stomach where I do long circles from left to right, working from the bottom of my stomach to the top.
  • With the chest and neck area be very gentle and brush in sweeping movement downwards.
  • Next I do my arms, starting at the back of my hands, sweeping up towards my shoulders.
  • Lastly I end with my back (which feel great by the way!). With my back I generally just do long sweeping movements up and down my back from one side to the other.

                   Below is a guide to the direction of brush strokes on the body.


Just as a caution, it should not be painful, so if it is hurting you either brush more gently or stop brushing altogether. Also, avoid areas that are sensitive or areas of broken skin.
For something that only takes 5 minutes a day and is very cheap there is not much harm in trying this out. I have decided to dry doing it for 30 days to see if I can notice any of these benefits.

Wish me luck and I will get back to you with an update
Xoxo Yvonne - Be Beautiful

Sunday, 16 November 2014

Saving money on makeup - dupes!

 Beauty dupes - Face edition

There are so many beauty products out there it can be hard to choose and find the right one without spending a tonne of money. Add to that the decision between choosing high end expensive "better quality" and cheaper drug store "poor quality" products. I put these words in quotation because this isn't always the case! There are so many dupes out there where you can buy a cheaper drug store product that is very similar to an expensive high end product. So read on to find out how to save money on your makeup while still buying good quality products!


#1 FOUNDATION

High end: MAC Studio Fix (right)
Drug store: Revlon Colorstay (left)


Mac studio fix liquid foundation is hugely popular for all makeup guru's. However, having tried both, I believe Revlon Colorstay liquid foundation is a great cheaper alternative. Revlon Colorstay is made in two difference consistencies, one for normal/dry skin, which is more moisturising, and one for combination/oily skin. I have repurchased this product more times then I can count and I can't see myself changing any time soon!

#2 CONCEALER

High end: NARS Creamy Concealer (top)
Drug store: Maybelline Fit Me concealer (bottom)


No one wants to use concealer that looks cakey, which is why so many people think this is one type of makeup to splurge on and buy high end products. However, now there is a great dupe for this you won't even need to anymore! The NARS creamy concealer is popular for its full coverage yet cake-free formula, but now there is the Maybelline Fit Me concealer, which works almost just as well! With a huge price difference, I know which one reach for when I am shopping.


#3 BLUSH

High end: NARS Orgasm blush (right)
Drug store: NYX Pinched blush (left)


The famous Nars Orgasm blush is hugely popular in the makeup community due to it suiting most skin types. The Nyx Pinched blush however, is a fraction of the cost and in most cases you wouldn't even be able to tell the difference!


#4 BRONZER
High end: NARS Laguna Bronzer (left)
Drug store: Rimmel London Natural Bronzer in Sun Light (right)

Everyone is always raving about NARS laguna, and while it is a beautiful natural and matte colour, it comes with a big price. A great alternative in Rimmer Natural Bronzer in Sun Light. This bronzer is a very natural colour and is also matte, and much better for your wallet!


So there you have it, the face edition of beauty dupes to help you save money on your favourite makeup products. There are many more dupes around so in the future I might make an edition for lips and eyes!

Thanks for reading,
Xoxo Yvonne - Be Beautiful

Tuesday, 11 November 2014

All about the eyes - how to get perfect lashes


Tutorial time!

Today is my first ever tutorial and it is all about the eyes. We all know that the eyes are one of the main features of the face and in my opinion the eyelashes make the biggest difference to how good your eyes look. Beautiful long, curly lashes are a pretty universal wish for women, but they aren't always that easy to achieve. It is much easier to end up with clumpy mascara which draws the wrong kind of attention to your eyes! So read on for my tips on getting long luscious eyelashes.


Before I begin, this is how my eye looks without any makeup. Pretty plain and boring with short thin lashes. But luckily that is all about to change!


 The first step I take is to curl my lashes with an eyelash curler. I try to curl them  as close to the base of the lashes as I can. I press and hold down for about 10 seconds, and then repeat for the other eye.


This is my secret weapon - waterproof mascara! I specifically love this one - Maybeline Full N' Soft Waterproof Mascara. This honestly makes all the difference for the final look. This is because waterproof mascara is oil based rather then water based meaning it will hold the curl for much longer. If you compare with using regular mascara, the curls drops almost immediately.


I apply this mascara to my lashes while shaking the wand to the left and right to ensure my lashes stay separated. I apply one full coat on each eye and then go back to apply a second coat. Do not wait until the first coat is completely dry, as this will most probably end up with the kind of clumpy lashes that no one wants!


And here is the final result! Long and curly, clump free lashes!


Thanks for reading and I hope you took something away from this post.

Let me know your tips and tricks for long lashes down in the comments!

xx Yvonne - Be beautiful

Monday, 10 November 2014

Out of the blue... an update!

I may have been just a little MIA - for almost... a year! To be honest, I got a little discouraged by having no followers so I just ended up not posting anymore. Out of the blue I decided to look at my blog after such a long time, and I have just found out that I have two followers! Now, this might not seem like much to you. But if you think about it, two people have (hopefully) consciously clicked follow because they want to see more of my stuff.

So to my two followers - thank you, you have inspired me to awaken my pretty dormant blog for some new and exciting posts!


Today's blog is going to be an update about my life and what has been going on since the last time I have posted. Since graduating last year I have more or less taken a "gap year" before getting into full time work. During this time I went traveling all around Europe for two months and I learnt a lot a about myself and the world.

I saw some beautiful sites, like the blue caves in Croatia, the canals in Amsterdam and the beer gardens in Munich.

 I did some amazing things, like a high ropes course in the trees of the Swiss Alps and white water rafting in the rapids of Austria.

I met some incredible people, like friends in our tour groups and my relatives in Holland.


All in all it was an incredible experience and well worth it. It also made me appreciate how good life is where I live. I don't have to deal with bag snatchers on a daily basis or beggars on the streets. I encourage everyone who hasn't already to travel and see the world. There is so much more out there and it is amazing to experience different cultures and lifestyles.


So there you go, now you have some insight into my life this past year. Thanks for reading and I will soon have a new beauty related post up!

xoxo Yvonne - Be Beautiful